Showing posts with label storage. Show all posts

Thursday, July 16, 2026

Storage: Eggs!

As my kids get older, the amount of food we consume has increased.  One grocery item specifically is eggs. We can go through a dozen eggs in about two days depending on what I'm cooking. Because of this, I've started buying eggs from a wholesaler near us. I can get 30 eggs for $2. These are not the kind of eggs I would be making homemade mayonnaise with or using raw, but for how I use eggs, they fit the budget and work for us. 

Because of our refrigerator is constantly holding over 15 eggs at a time, I needed a better way to store them. Back in April/May, we were at the store browsing and came across egg drawers. The idea was cool but I couldn't fork over the money. They were around $12 each to store 18 eggs. The plastic felt thin and cheap. Some of the ones on the shelf were already cracked. I looked online to see what else was out there and found ones sold at The Container Store. These were over $20 each. We didn't end up purchasing anything. 

Earlier this month, we were facing an egg surplus in our refrigerator. I always like to have eggs on hand because they're an easy meal-maker if I don't feel like doing any serious cooking. This time though, I overdid it a bit. We still had eggs at home and I added to our collection by buying another 2.5 dozen from the store. What resulted was 43 eggs in our refrigerator at one time. 

I saved egg cartons from the stores that hold two dozen, but I didn't have enough to hold all 43 eggs. What resulted was a weird mishmash of three containers in our refrigerator to hold them all.  


Chaos.

Storing these eggs precariously in our refrigerator like this drastically reduced our storage space. I couldn't put anything on top of the eggs in this level anymore. It is true this setup doesn't stay forever as we eat the eggs, but it does make for an inconvenient use of our refrigerator for at least a few days. As we ate the eggs, I rearranged them in the fridge to be more organized, but even so, it wasn't ideal. 

I was able to consolidate the eggs to one side of the shelf, but still 
couldn't stack anything on top. The ones in the bowl are raw.

After enduring these days of precariously storing eggs in our refrigerator, I decided again to look online to see what was out there. I remember seeing The Container Store advertise their big clearance event. I had even browsed a few pages of their clearance online for fun but didn't see anything worth purchasing. This time, I searched their egg storage again. Did I get lucky?

I did! They were 70% off regular retail so I was able to get two for the price of one. I've purchased their brand of organizational bins before so I knew their plastic quality was much better than the ones I'd seen at the other store a few months prior. I ordered two of them and waited patiently for my in-store pickup confirmation. The eggs in my refrigerator are now organized nice and neatly in two stacks of 18 (when maxed out).

Open.

Closed. I should probably remove the front stickers...
 

I am super happy with how this turned out! I have room for 3 dozen eggs in my refrigerator now, and if somehow I happen to have overflow, they're going to live on top for a little bit in my half dozen carton. It is true my refrigerator will have two egg drawers taking up space on this shelf even if I have zero eggs in my refrigerator. The likelihood of that is pretty slim though. Regardless, this organization works for us because I know exactly how much space I have in my refrigerator to use and it will not be affected by how many eggs I need to store. 

If you want your own egg storage drawers at a good price, they still have some left (in my area)! Not sponsored by The Container Store. 

Wednesday, February 14, 2024

Another Cabinet

We started the year with a project again. It's no surprise, we did the same thing last year. Although this year's project didn't involve any cleaning out, it was motivated by organization and storage.

Since we remodeled our bathroom in 2017, we've had a little niche in the bathroom. Originally, we had a massive storage cabinet and a tiny shower. When we remodeled, we enlarged the shower and stole some space from the original cabinet. We did not put a cabinet back, and instead, were left with this niche. 

It had strange dimensions. 96 inches tall. 24 inches deep. 20 inches wide. For the last six and a half years, we put a shelf in the space, but it didn't fit well, left a lot of unused space on top, and a lot of unused space on the sides. I would always go on random rabbit trails online looking for shelves or cabinets we could use to fill the space. Last winter, we finally committed.

We found a tall, narrow pantry cabinet which had the closest dimensions to our space: 96 x 24 x 18.

Moving this box into our bathroom took some skill.

The actual installation of the cabinet itself was rather quick. The problem was the details. We had a six inch gap at the top and a two inch gap on the sides. The goal was to make this cabinet look built-in, like it belonged perfectly in the space. 

Test-fitting the cabinet. 

As a result, we needed to fill the side, cover it in trim, and somehow figure out a way to fill the gap at the top of the cabinet. We brainstormed ideas to "crown" the top in trim, build an insert to fill the space, or somehow extending the top of the cabinet. In the end, we ended up using a genius trick to fill the space: raise the cabinet up from the bottom. 

We had some existing wood in our garage which hadn't been thrown out during last year's purge for the lift. My husband built a box for the cabinet to sit on and secured the entire cabinet on top of the box.

Much smaller gap, and I painted. We added three extra shelves because the unit
originally came with two. We can now maximize that space in storage.

My husband really detests painting. I've done all our DIY painting projects we've ever done. The only thing he painted was our master bathroom vanity cabinets. I was pregnant at the time so he primed and painted those. The rest? All me, now including this cabinet and three additional shelves we added. 


We added some hardware, reattached the doors, and voila! A built-in cabinet in an awkward space. You'd never know it wasn't planned to be there in the first place. The best (and most ironic) part was about a day after this cabinet was installed, I'd already "forgotten" about it. It blends in seamlessly into the rest of our bathroom and stores a ton of our extra towels and toiletries.

Tuesday, April 18, 2023

Part One: The Fool and the Follower

The Follower lived in a beautiful house with not so beautiful things. There were not many and the house felt sparse, but The Follower didn't care. They worked, they sufficed , and there were no complaints. One day, The Fool entered this beautiful house. The Fool took a look around and considered. This house was not beautiful enough. It needed more beautiful things. 

So The Fool went shopping and purchased items. Beautiful items. New items. And in they started. At first, it was different. Different was not something The Follower was used to. The Follower was discontent and voiced this discontentment. The Fool didn't listen. In came more beautiful things. Beautiful things became just things. The Follower slowly lost a voice, lost the discontentment, and let it happen. 

Slowly, the house of not so beautiful things that was sparsely filled became the house of overcrowded beautiful things. Items which individually could have been decorative, beautiful, lovely, now became a plethora of things, overcrowding countertops. Storage was needed to store the excess items. Beautiful things became forgotten because they were piled on top of each other. You couldn't even identify one item at a time. It was all so overwhelming to look at. 

The beautiful things all together became not so beautiful. And slowly, this once beautiful house with not so beautiful things became an ugly house with ugly things. But The Fool did not notice how ugly the things were becoming. The Fool wanted more and more. In everything came. An item here. An item there. Slowly, steadily. And The Follower did not say a word. 

In the midst of this infiltration, The Fool became discontent with a table. This table was too small for The Fool. It wasn't large enough to hold all the things The Fool wanted to display. Display is an understatement. The Fool asked for a Larger Table and The Follower obliged. 

Now The Small Table was one of the few "beautiful" items in the once beautiful house. It was a table of solid wood, kept in very good condition for its age. But The Fool didn't want it. And The Follower didn't see it. In barged the larger table. Next to a wooden shelf. Next to a baker's rack blocking a wall of windows. Next to a floor filled with wastebaskets, four on the floor within a 25 foot distance. The empty space around what used to be the smaller table lessened. The space felt even more cramped and uncomfortable. 

The Small Table was unwanted. The Follower did not know what to do with it. The Fool didn't want it. There was no space in other rooms for the smaller table to live. So you know what happened? The Small Table was relegated to the back patio. To The Fool and The Follower, it was problem solved. They didn't want it, they didn't see it.

The Small Table was now exposed to the elements. He saw the hot sun of summer and the cold snow and ice of winter. He felt the strong winds brush against his surface. A wasp made a home underneath an eave. Dust and pollen blew around him, settling on top. The Small Table stayed like this for years and years. But you know what? He was happier outside exposed to the elements than he was inside. Because inside the once beautiful house was suffocating. Inside the once beautiful house, he went unnoticed under and next to the piles and piles of things. 


Outside, he was in plain sight. Yes, he was getting weathered by the elements, but he was visible. And the smaller table made a vow to persevere until someone noticed his beauty. 

Years later, Foresight came upon this house....

Part Two

Wednesday, March 29, 2023

Living the Dream

It's hard to imagine we've almost been in our house for eight years. That's twice as long as the previous owners. We bought our first house as newlyweds, began renovating it, and have since brought home two babies. Six months after we bought the house, we finished painting all the kitchen cabinets and drawers and were able to park our cars back in.


At the time, it only took 1.5 hours to clean the garage and pull both of our cars back in. Our overhead storage rack was completely empty and we didn't own nearly as many tools, gardening equipment, our chest freezer, a bike trailer, or eight total bicycles (children's + adult's). I was impressed then and vowed to always keep our garage clean enough to be able to pull two cars into it. 

Nearly eight years later, I've kept that vow, and done an even better job than I thought was possible. What's better than parking two cars in the garage? Parking THREE cars in the garage! Now FYI we have two-car garage door. So the opening is only big enough to park two cars. So....how did we do this? 

I blogged about the first part of this project last fall. You can read about my Garage Saga series here to catch up if you didn't already read it. 

Yesterday, the rest of the dream was completed. After about a year of research, we finally pulled the trigger and purchased the car lift. Originally, it was going to be installed in February, but we conveniently received a notice from the city a week after we made arrangements that they would be doing alley construction for the next month. We called the installer and requested a later install date. 

In the end, the city construction finished the weekend before the original install date was scheduled. But the rescheduling worked out anyway because we needed the extra time to clean out the garage to make sure the lift fit.
Whenever I told people we were getting a lift, they'd get confused because nobody really knows what a car lift actually looks like. This is what a car lift looks like. It's basically a mechanical elevator for a car. 


The same two cars from eight years ago, now stacked on top of each other. 

No, this is not at a mechanic shop.
Our two car garage is now a three car garage! 

I've upped my own antes now. Must keep the garage clean enough to always park three cars in it now. 😂 I didn't think I'd care for the car lift as much as my husband, but after seeing it installed with our cars all neatly parked inside our garage, I really, really love it. 

Also as a side joke, I bought myself a Hotwheel. We were picking out cars for my son for his birthday, and I decided to get one I liked, too. I picked it because I liked the color and it looked pretty chic. 


When I got home, I decided to Google this car to see how much it would cost in real life. $1.695M you guys. I never thought I was a car person, but man, I sure know how to pick a car 😝. I didn't even notice it doesn't have a windshield until I read the description on the website: created to deliver nothing but the purest driving experience. For the rest of us realists, this translates to: you will feel all the wind in your face and possibly eat a bug or two when driving. 

Don't think I'll be getting this car in real life anytime soon...but it's a pretty little model to look at. 😁

Tuesday, January 17, 2023

A Wood-Filled Weekend

With a sequence of events, we need to clear our some more space in our garage. One of the main things that needs to go is a bunch of wood we've saved up over the years from various projects. Before just getting rid of all of it or giving it away, I thought we should try and finish some of our own projects which have been on our to-do lists for years and years now. We accomplished both of these projects this past weekend:

1. A "box" to cover the vent hood pipe that goes into the ceiling in our kitchen. 

In April of 2021, we made the decision to vent our range hood vent outside instead of having a recirculating one. It was one of the better decisions we've ever made for our house because I love it so much. I can cook and vent the smells outside and you can't smell anything after a few hours. I don't regret anything about the project except the person we hired. For the last 1.5 years, we've been staring at a really ugly ceiling patch where the pipe connected into the attic. The pipe is also not centered, but that is secondary to the ugly ceiling.


My husband has mentioned wanting to build a box around it to hide the pipe from the beginning to fix both problems. We were finally able to use some leftover MDF board from previous projects to build a three-sided "box" to place in front of the pipe on top of our cabinets. I had used play-doh a long time ago to trace the edge of the trim against our ceiling so we could cut the appropriate edge to cover there as well. 

After a few coats of paint and primer, we had ourselves a white cabinet box to make our kitchen range hood look centered and neat. 

We will hopefully add some trim around the top of the box to match the traditional style of our kitchen as right now it looks too clean and modern. But for now, this box fixed our main issues. Total cost* of this project: $0

2. Utilizing the other half of our second blind corner cabinet.

For my birthday in 2020, I bought blind corner shelf pull-outs and had them installed. To this day I still love using them and they have been super helpful. We have one other blind corner cabinet but the same pull-outs would not work in the other cabinet because it was a smaller cabinet. 

However, this cabinet had space behind it we could use.

The open cabinet is the one with the blind corner.
We've never been able to fully utilize that space. 

This is the backside of the cabinet which allows us to
make a cut to use the blind corner.

We had talked about cutting a hole from behind and adding another door to create another cabinet in our kitchen essentially. This project never came to fruition because I wasn't convinced we had a way to cut open the cabinet to make a clean rectangular opening. This past weekend on Friday morning, I asked my husband again if we could do this project. I was also more convinced to want to do it as a way to use up some of the wood we had stored before we got rid of it all. 

By Friday evening, after the kids went to bed, we got right to work. It took us the entire evening to get the hole measured, prepped, and cut, but we did it.

Really clean cut with a multi-tool he purchased last year.
I have no problem with spending money when it can earn its value.

The next day, my husband spent the whole afternoon making drawer boxes for me. That evening, we had one installed with the sliding tracks. It took much more time than we anticipated because the drawer slides were nearly impossible to separate. We looked up Youtube Videos from different people with three different methods on how to remove them. After a lot of pulling, tugging, and frustrated grunts, we were able to separate the slides and have them installed on their respective halves. 

On Sunday afternoon, my husband finished making the cabinet door completely from scratch! We used an old piece of plywood originally from the house we had saved from a previous renovation. We added some trim to fit with the style of the rest of our house. I primed and painted Sunday evening and by Monday morning, everything was installed and complete. 

Comparable pull out shelves like this would cost $100+ each...(yes, we've looked into it.)

Yes, I've already filled them up. Will need to reorganize the
pantry now that I have more space. 


The secret passageway has a proper entrance! 


Total cost* of this project: $30.90 

I'm really pleased with the way this project turned out. I know we waited years before turning this cabinet into a reality, but now that it's completed, it's really exciting to add another 4 cubic feet of storage space!

*Cost refers to new dollars spent. All other materials we had leftover from previous projects.

Sunday, January 1, 2023

Conclusion: Small Kitchen Appliances

At the beginning of last year, 2022, I set out to track my small appliance usage every single day. I created a chart, printed it out, and put it on the side of our refrigerator. Every time we used an appliance, I would mark a tally. I limited myself to one tally per day because if I tallied every single use, it would affect the results. My logic was I could borrow an appliance from a friend and use it three times in one day and return it. But if I used it three times over the course of two weeks, I would have had to keep someone else's appliance for two weeks or borrow it three different times. I am less likely to do the latter. 

My small kitchen appliances.

My chart contained 19 small appliances. I go into a bit more detail on how I define small appliances and why I included the ones I did in my original post linked above. The toaster oven, kettle, and rice cooker did not receive tallies because they were automatic winners. I will never get rid of these no matter what, and if one breaks, we are definitely replacing it. They are staples to our lives and that's never changing.

From the rest of the list, the lower was our hand mixer. It received 0 uses this year and I actually sold it in November of last year. 

For visual learners, here's the data summary if you can understand my notes.

Now for the rest of the list starting from the bottom:

10th place: Stand mixer - 2x

This one makes me kind of sad, but at the same time, I know why it came in last. I don't really bake. I enjoy cooking much more. It's also a very heavy appliance to move from storage to counter, and unfortunately, it won't fit underneath the cabinets on the countertop for daily storage. I will never get rid of it because I do occasionally make cookies, banana bread, or knead dough with it. But the number of times I do in one year will be very small. 

9th place: Steamer and dutch oven - 3x

We switched to induction last April, and since then, our steamer does not work with our induction cooktop. I figured out a creative way to still use the steamer, but it didn't happen often. Off the top of my head, we use our steamer to make two things: turnip cake and steamed buns. I made neither of these multiple times, hence why we only used our steamer three times last year. 

The dutch oven refers to my enameled cast iron dutch oven, I have a stainless steel dutch oven I use regularly in cooking. My enameled cast iron dutch oven is the lesser used because it is heavier to clean and I need to be a little more careful when I use it. It's one of those things that's great to have but in all honesty, I could probably get rid of it if push came to shove.

8th place: Popcorn maker - 4x

This was a surprise not-last-place for the popcorn maker. I didn't use it all year and was expecting it to come in last. However, my kids have gotten older and I remembered we had it so I pulled it out and made popcorn for them a few times. I think for now, it is not on the chopping block, but down the road, we may reconsider whether to keep it or not. 

7th place: Juicer, Mini warmer, immersion blender - 6x

We bought our juicer specifically to juice citrus in the winter months when citrus is in season. It received a lot of use in 2021. Unfortunately, that wasn't the year I was tracking. Last year we saw less juicing because the winter storm killed the fruit trees at my in-laws's home so they didn't have excess to share with us.

My mini warmer is a small plug in warmer that came with my crock pot. We have used it the most to heat up canned corn to go with certain meals. It's safe to say we ate at least six cans of corn last year.

The immersion blender is one I'm not convinced I will need often in the future, but it will earn its keep for now. I used to use it a lot when I was making baby food, but again, that was not the case in 2022 as my youngest turned 2 and could already feed himself. The one use I love is to blend beans in my chili. My kids will eat the chili I make, but they will not eat beans. So halfway through the cooking, I blend up the beans and then add the rest of my ingredients. 

6th place: Crock pot - 8x

I was genuinely surprised I used my crock pot this many times. Because we do have an instant pot with slow-cooking capabilities, I expected just to use the instant pot. However, I do find sometimes the instant pot is too hot, even on the slow-cook function. It is also nice to have both to use for double portions when cooking large amounts. 

5th place: Griddle, Waffle maker, Vacuum sealer - 17x

These three appliances align in how we use them which is perhaps why their usage was so similar. We use our griddle primarily to cook bacon and tortillas. I cook an entire package of bacon on the griddle and then freeze the leftovers. When we run out in the freezer, we repeat the process again. Tortillas are similar except we do not freeze them because it ruins their texture when homemade (in my experience). 

I use our waffle maker to make a large batch of waffles to freeze and we reheat for breakfast. Each batch lasts anywhere from 2-4 weeks depending on how often my kids want to eat waffles for breakfast. It is super convenient to be able to pull out pre-made waffles from the freezer without paying a premium for commercially made and packaged ones.

Our vacuum sealer gets used approximately 1-2x a month so this number is very reasonable. Whenever I see a good price on meat, I will buy large quantities of it and then vacuum seal them for the freezer. I save it in the freezer anywhere from 2-8 months generally. Sometimes, if it gets buried deep, we will end up with meat that meets its first freezer birthday. We still eat it. I've yet to get sick from eating vacuum sealed meat we stored in the freezer. We're more likely to get sick from fast food, grocery store sushi, or old orange juice, all of which has happened at least once.

4th place: Food processor - 28x

I used my food processor a lot last year. I used to not be inclined to want to use it because of the cleanup, but I realized, it's so much faster at shredding carrots and potatoes than I could ever do by hand on a grater. I also ground my own meat in my food processor this year just to experiment. The cleanup was a little bit messier than I would have liked, but the end result was very similar to what I would have gotten buying ground meat from the store. 

In fact, I used my food processor so many times last year, I justified buying myself a new one during the holiday sale. I had actually been eyeing one since holiday season 2021 but did not bring myself to purchase it. After tracking the usage in 2022, I justified making the purchase. I was even able to sell our old one to help cover a portion of the new cost. 

3rd place: Blender - 29x

Our blender gets most of its mileage in the summer during smoothie season. The rest of the year it may get used sparingly for a pesto or tomato sauce. Our blender turned eight this year. We said goodbye to our warranty, but it has replaced two blender cups and one base motor for us. We aren't complaining. To us, it's been well worth the investment we made. 

2nd place: Instant pot - 39x

Technically, first and second place are the same appliance. However, I separated them because even though we purchased it together as a bundle, they can be purchased separately. So because of that, it is possible to be a separate accessory which changes the entire use of the appliance. I've loved my instant pot since the second year we owned it - the first year was my learning curve...which was steep because I was too afraid to try it. After I got the hang of it, I love it. As you can see, the average use is over 3x per month.

1st place: Instant pot air fryer - 65x

Our air fryer earned its keep with flying colors last year. It averaged being used over 5x a month. We were really excited when we first bought it, and it's still very handy to have now. I have returned from taking my kids out, been crunched for time, and put lunch on the table in 10 minutes from entering the house. That's the power of air fryer convenience (and frozen food). 

Now air fryer vs toaster oven vs air fryer toaster ovens....that's a topic to ponder for another post. 


Any ideas on things I should track this year? 😀

Thursday, January 6, 2022

Small Kitchen Appliances

Happy New Year! 

Sometime in the middle of last year, a thought hit me. I wondered how many times I actually used my small kitchen appliances. Honestly, they take up a lot of space in my kitchen. And they're not cheap. So why do I take the money and space to buy and store them? That's what I wanted to find out.

How do I define what a small kitchen appliance is? It's something specialized I use in the kitchen to prepare or cook food or drink. I own a lot. 19 to be exact. Most of them are electric and require plugs. I’ve added a few which don't for the purpose of my experiment. Here's the list of all of our small kitchen appliances:

  1. Instant Pot
  2. Instant Pot Air Fryer
  3. Stand Mixer
  4. Griddle
  5. Juicer
  6. Waffle Maker
  7. Popcorn Maker
  8. Crockpot/Slow Cooker
  9. Mini Food Warmer
  10. Food Processor
  11. Blender
  12. Vacuum Sealer
  13. Hand Mixer
  14. Immersion Blender
  15. Toaster Oven
  16. Kettle
  17. Rice Cooker
  18. Steamer
  19. Enameled Cast Iron Dutch Oven
Microwave is not listed because our microwave is built into our kitchen. I know not all houses or apartments come with built-in microwaves, but for my situation, it is not being included in this survey.

The first 17 are all plug ins. The last two are not. Three are bolded because I am positive we will be using those daily or close to. Those are must-haves in our house. 

When we got married, we only had about 9-10 on the list (mostly wedding registry gifts!). The other half of them we've slowly amassed over the years of cooking adventures and life. I'd justify owning them all, but they take up a lot of space. This year will tell me what's really worth owning and what isn't worth the storage space.

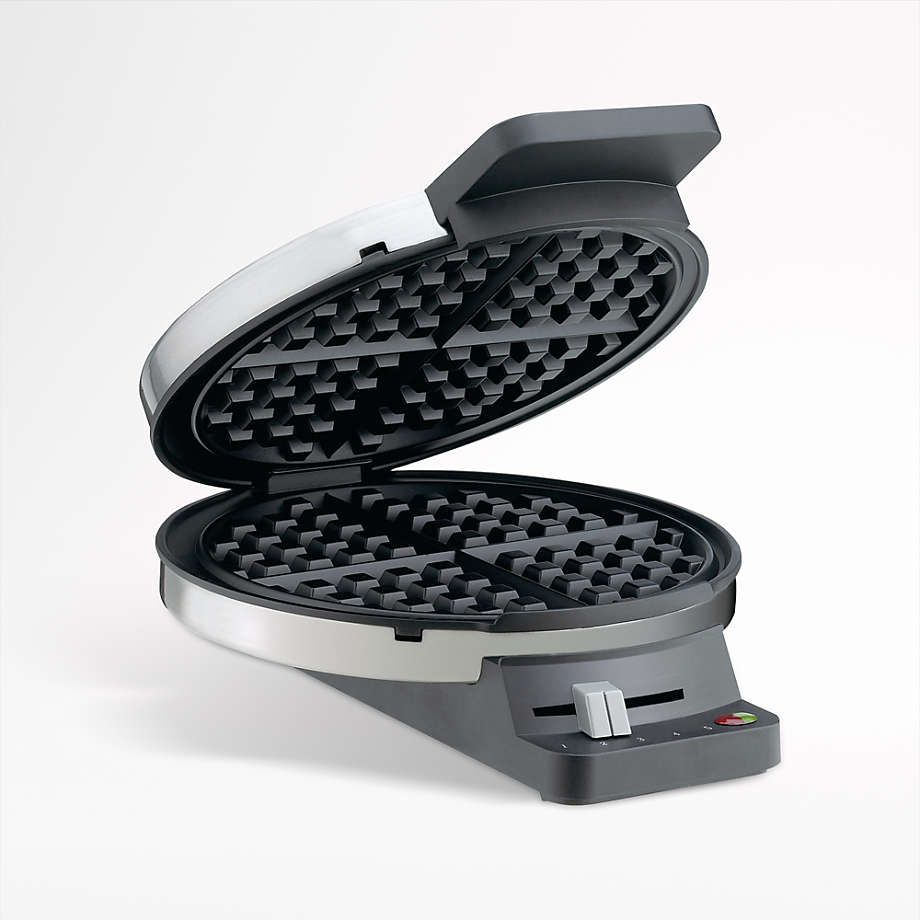
Remind me to tell you the story about how I snagged our waffle maker for less than $0.11. Yup, that's right. Eleven cents! It's even a Cuisinart one!

Cuisinart ® Classic Waffle Maker (Open Larger View)
We've used our waffle maker numerous times for it to be worthwhile, but
I wonder how many times I will use it this year...

Do you own any small kitchen appliances that aren't on my list? Let me know if you do! 
Which one do you think I will end up using the most? (Besides my three non-negotiables)
 

Monday, March 8, 2021

Storage 101: Master the Closet

This is the last part in my Storage 101 series. You can catch up on the previous parts here: Intro 1 2 3 

At the end of 2020, we began organizing our master closet and we finished everything in January 2021. It was a spur of the moment project which had been in the works for a few years behind the scenes.

When we bought this house almost six years ago, I really liked the master closet. It was large, spacious, and had shelves and rods to hang and fold clothes. It never came up as something needing to be redone because its functionality was okay.

But there came a point where okay was not good enough.

I began to realize I wanted more drawer space instead of hanging space. In January of 2019, I found a drawer shelf unit secondhand and went to go pick it up. My daughter was nine months old at the time and it was a brutally cold day. To my lack of preparation, the shelf did not fit easily into my car, and although it did fit when we switched the car seat to the other side, I could not lock the car seat back in place and safely or legally drive home. So the kind husband offered to load up the shelf in his pickup truck and drive it home for me. The drive wasn't far as they only lived five minutes down the road, but he didn't have to do any of this.

Kind people exist. You just have to meet them.

I bought new drawers compatible with the shelving unit and set it up in my side of the closet. I used this set up for almost two years before finally realizing it wasn't working anymore. Clothes would sit on top of the drawers and pile up into a stack. The drawers themselves were not enough space for me to easily store and remove the items, and the overall look was very sloppy. 

One evening last December as we were going through the motions to wind down for the evening, we landed on the topic of redoing our closet again. I asked my husband about constructing a drawer unit the way I wanted and we talked about the price of wood and supplies. This led to a quick google search to see if I could find something pre-made and adapt it to my liking. This google search ended up being a rabbit trail which led us to design our custom closet using Elfa from The Container Store. 

We had perused the Elfa collection years before. One evening for fun about five years ago, we were at The Container Store looking at their custom closet solutions. At the time, I was thinking about getting a shoe organizer. The Container Store had these beautiful gliding shoe racks which actually held a good number of shoes. We got a small design drafted up, but that was the end of it.

This time as I thought about installing some new drawers in the closet, we decided to redo our entire closet so it could be almost completely custom. Translation: Hubby saw how good my side looked and he wanted his side to look that good too. In order to do this, we had to remove three closet rods, retexture the wall to match, and paint. It sounds easy on paper, but it was actually a two-day process because we needed to wait for everything to dry properly. I also ended up redoing the wall texture twice because the first time did not match as well as I wanted it to. 

Then we began installation. The Elfa system is designed to be very DIY-friendly. First, we installed the top tracks. We measured and had them cut so every single screw would hit a wall stud for the most secure installation. It is a few extra steps, but I believe it's worth it considering these are going to hold up to 100+ pounds depending on how much clothing you're storing. Then we hung the hanging standards and used brackets to install gliding drawers, gliding shoe racks, and shelves. It was a lot of fun. Was it a lot of work and did it take a few tries to get it the way I wanted? Yes, it absolutely did. But I found the work very therapeutic and exhilarating from my normal SAHM and working part-time duties.

I'm not going to lie. After we finished the closet, there were a few times when I would purposely go to the closet, sit in it, and admire our work. 

Wifey's Drawers

Wifey's Hanging + Shoes

Hubby's Hanging + Drawers. The picture is deceiving. Our halves are almost equal.

Wifey's Long Hanging

That is all my clothes I own and wear in our closet. Do I own a lot, less than average, or a normal amount? I've always wondered because I never thought I owned a lot. But once I realized how much storage I needed to store it all, it made me start to wonder if I actually have a lot of clothes...or just normal amounts. 🤷🏻‍♀️

This was not an inexpensive makeover of our closet. However, I was also able to reuse some of the old storage solutions in our kids' closets. The shoeboxes that used to hold our shoes are now in my son's room holding his shoes. 

I was able to fit 3-4 pairs of shoes in each box and labeled them by putting
a scratch piece of paper under the lid as a simple DIY label. 

I was also able to repurpose the shelf and drawers I originally had in my son's closet to hold his clothing in larger sizes. My daughter already had one of these shelves because hers is one I inherited from a friend back in college for my apartment. 

This is the original drawer unit I purchased second hand
being repurposed in my son's closet. There was never anything wrong with it.
'I just realized I was exploding each bin with clothes and needed more space.

I'm not one to spend a lot of money, and especially not spending money on things to hold my things, but this was completely worth it. Even now, as I finish this blog, I'm getting excited all over again for how functional and aesthetic this closet makeover is. Good things are worth the cost. Thanks for reading. 🙂

Wednesday, February 24, 2021

Storage 101: Drawer Tetris

This is part 3 in my organization series Storage 101. If this is your first time reading, you can catch up on the other parts here: 1 2 

We organized drawers in two areas of our house: the kitchen and our master bathroom. 

As mentioned in a the previous blog of this series, my goal was never to have Instagram-worthy photos of beautifully color-coordinated drawers with neatly organized items. I don't believe that is real life. Sometimes, by coincidence, it happens in small quantities. My goal is to create an organized space that is easy to use where none of the items catch when opening or closing the drawer. 

We also did not organize every single drawer in either of these spaces. That was never the goal either. I wanted to organize the drawers which were used the most and with which I was most dissatisfied. This being said, we still have drawers full of random "stuff." I don't have a problem with that because those drawers are not used as frequently and therefore, do not dissatisfy me nearly as much. 

So here's what we did: 

Kitchen:

We organized four drawers in our kitchen. Two of the drawers are for kitchen utensils. One is for eating utensils and the other is for prepping and cooking utensils. The other two drawers are for office supplies. 

Once again, one of the first things I did was measure. I measured drawers. I measured utensils. I measured measuring tapes. There was a lot of measuring. One of the things that organizing companies can do is they buy all sorts of storage sizes and see what works best with the space during the actual install. I...don't exactly have this luxury, so I have to do a lot of pre-work beforehand or risk making multiple trips to the store which is not something I can afford to do right now. 

Then I played around with the storage organizers and looked at what items fit best in each container and basically played tetris. Our original utensil organizer moved to our bathroom and became a drawer organizer there when we moved to the house. We bought a larger utensil organizer for the house. With this reorganization, the larger utensil organizer became the kitchen gadget utensil organizer and the original utensil organizer came back to the kitchen and was reinstated as the utensil organizer.

This utensil organizer was my bathroom drawer organizer for a while
until it came back as the utensil organizer


The utensil holder we bought for the house when we moved in
has now become the gadget utensil drawer.


That spool of string is....22-24 years old. That pencil box is also about 25 years old.
My NASA ruler is at least 20 years old. Who says old stuff has to be replaced?

In our office supply drawer, I am still using small cardboard boxes as drawer organizers because they don't all have to be fancy or match if you don't want them to or can't afford it. The smaller purple one is one half of an old card box. I find that size and depth is great for organizing knickknacks.

Bathroom: 

This drawer was originally organized
using the utensil organizer. I think it looks
much better this way. 
The bathroom was more or less the same process. My original drawer which used the utensil organizer was replaced with rectangular organizers of various sizes. I was able to organize a second drawer as well which used to have no organization and has now turned into my favorite bathroom drawer. One advantage to using smaller containers rather than putting lots of items in a larger container is the items stay put rather than slosh around as you open and close the drawer.

It’s so fulfilling to be able to open a drawer, get exactly what you need, and close it again without displacing the other contents by laws of physics. 


If bathroom drawers had favorites,
this would be mine.


If Clea and Joanna saw the way I organized my nail polish, they’d probably cringe and die a little on the inside. But here’s why I chose to do it this way:

1. It saves space  

2. I don’t have that many so I know all my colors by the tops of the bottles.

They would probably recommend storing them in a way where you can view the bottle from the front instead of from the top. Aesthetically, it looks better, and you can create their quintessential color-coordinated look. However, that wasn’t conducive to my space because I wanted efficient, convenient storage. As mentioned before, this works for me because I only have 13 bottles of nail polish. 

I bought these containers from Amazon and reused some other ones in various drawers because that was the cheapest way to do it. However, buying from Amazon always involves a bit of risk because you can’t see what the actual product is like until it arrives at your house. And although they have a pretty good return policy, it is time consuming and does involve dropping it off and waiting for your refund. 

One thing I discovered is the containers I bought are not straight down the sides. They taper inwards so the bottom dimensions are smaller than the top dimensions. This made storing some things slightly frustrating because despite measuring, I didn’t account for tapering. 

These are the small details on why one container can cost $1 a unit and the very same size and material will cost you $6 a unit elsewhere. Some of the drawer organizers I bought came with metal feet which gave the container a more weighted, sturdy feel. Others felt like I could snap them in half if I handled them improperly. 

All containers are not created equal. Shop smart. 

Stay tuned for next time: The Master Closet

Thursday, February 4, 2021

Storage 101: The Pantry

This is part 2 of my Storage 101 series. If you missed part 1, you can catch up here.

Disclosure: I'm not about the beautiful Instagram-worthy photos. I'm about real life and telling it/showing it like it is. Take it or leave it. 

There's a house one street over from our house which we put an offer on when we were buying houses. At the time, I really wanted that house for two main reasons: 

  1. It had a walk-in pantry.
  2. It had a utility room sink.
Not having a utility room sink doesn't affect me much after all. Washing paint brushes in a bathroom sink isn't ideal, but at the end of the day, having running water in a basin is pretty much all the same. Not having a walk-in pantry on the other hand has often made me sigh.

Our pantry, although not a walk-in, has space. It's two sets of cabinets, one on top of the other. In total, we have less than 40 cubic ft of space. After having kids, our pantry was starting to look disheveled with all the snacks and cereal boxes piling up on top of each other.

This was our pantry before I went through and redid it.


By no means is this on the extreme messy spectrum. However, it could have been much better.

One problem we've always had is not being able to see things in the back of the pantry. The space itself is quite deep which is a good and bad thing. Good: it can store a decent amount of stuff. Bad: you can't see it all. Unfortunately, the solution is to not use about 9 cubic feet in order to maintain visibility throughout the space. So if you do the math, that only leaves approximately 30 cubic feet of usable pantry space. That's a little larger than the size of an average refrigerator in 2021. 

I took my storage inspiration from The Home Edit and used clear storage bins to organize our pantry. We bought wide and narrow containers and mixed and matched as needed. It just happened to work where two rows of shelving were the same height as the bins so we could maximize the space.

I had a lot of fun unpacking our entire pantry and rearranging/reorganizing the space. I also followed the rules where most used items are accessible at lower parts of the pantry and/or kept in the front of the space. I tried to move as much of the unused items to the top of the pantry and in the back of the shelves. To be honest, we just need to get rid of more things, but I can't bring myself to yet and we can still afford to store it without creating a mess. Taking from Marie Kondo here in not having to trash everything but simply keeping them stored well. 

Simply more joyful to look at.


After organizing the top half of our pantry, I decided to tackle the bottom half as well. This space is where we store larger pantry items as well as the "value size" refills for various items: cooking oil, rice, bulk cereal, etc. 

A big part of utilizing the space well was removing our paper towels. I'm not going to lie. We had over 12 rolls of paper towels stored under there. When we were a married couple without kids, this worked okay. Now with two kids and a lot of snacks, we needed the space. 

One afternoon, we spontaneously came up with the idea to reuse an old organizer I bought while in college and hang it in the garage to store lightweight paper items, ie: bulk paper towels.

I covered up one of my garage masterpieces, but I'm okay with that.
And no, we did not hoard paper towels. I bought one bulk pack back in 2019.
In February of 2020, I used a free coupon to get another bulk pack because
that's when the coupon was expiring. We use paper towels really slowly.
None of this was related to Covid.

This freed up SO much space. 

As far as organization, I knew I wanted to keep half of the space tall to store our 50 lb bag of rice* and stackable boxed goods. The other half, I wanted some shelving to store round jars and other shaped containers. Originally, I reused old diaper boxes turned on their side to create grid boxes so I could map out what kind of shelving I wanted. This worked out so well I ended up keeping them permanently. Diaper boxes are really sturdy. 
Our lower pantry. 

*Fun fact: Between my husband, my daughter, and myself, we ate over 100 pounds of rice in 2020. 

The storage bins for our pantry reorganization did cost quite a bit, but everything has a designated bin and it has stayed relatively organized. Even three months after our initial cleaning and reorganizing, everything has generally stayed neat and tidy.

We even replaced the batteries in our puck lights so we can see into it at night!


This is how our pantry looks like 3 months after the initial reorganization.
Everything has generally been maintained. No, this is not a staged photo.
It was taken one morning before the kids woke up on a whim.

Maintenance is a key aspect of organization which often gets overlooked. Sure, it may look prim, proper, and clean upon its initial organization, but the true test is whether or not you can maintain it. Our pantry? Yeah, it's definitely been maintained which proves two things:

1. The organization system works.
2. Everything actually has a place.

Next time: Drawer Tetris

Thursday, January 28, 2021

Storage 101: Blind Corners

This is the first part of my 4 part series. To read the backstory on how we started reorganizing around our house, click here.

We have two blind corner cabinets in our house. We never used them efficiently from the start, but we never really had a reason to need to. Until we did.

For those of you who aren't familiar with blind corner cabinets, they are cabinets with a "blind" corner. Essentially, it's a cabinet, but then either to the left or the right, there is extra room but unaccessible straight from the cabinet door. If you're a visual person, I've created a nice diagram. 


This is exactly like one of our blind corner cabinets. The blind portion is almost exactly the same size as the area straight ahead of the cabinet door. So we were really losing out on half of the space of the cabinet by not using it properly.

In 2020, we gained lots of small kitchen appliances and kitchen gadgets as well as upgrading some to nicer/more permanent options.

1. We got an immersion blender, and to be exact, it was winter 2019 when we received it. It had no permanent home in our kitchen so it sat in the box on top of the refrigerator next to other miscellaneous items with no permanent home for almost a year. Using it was pretty precarious and we caused a few avalanches.

2. We bought an electric griddle. This griddle is advertised to store vertically in a slim space. However, the cabinets in our kitchen came with a shelf in the middle to create two tiers so this was impossible for us. The griddle is 15"x19"but none of our cabinets have a 15" height clearance. We attempted tucking it into the space between our cabinet and our refrigerator, but this caused more problems because we didn't want the kids to find it or it to scratch against anything. So we were forced to find a place to store it flat.

3. We upgraded our colanders. We had a set of three with stainless steel mesh, but over time, I realized stainless steel mesh was not my preference. We bought another set with perforated stainless steel which we absolutely love. I'm not going to get into the differences between the two here, but if you don't know the difference and you're curious, google them or send me a message and I'll tell you all about them! We didn't get rid of our old ones because sometimes I need more than one strainer in a large or small size, so it helps to have multiples. 

4. We got a kitchen scale. I. Never. Knew. How. Much. I. Needed. One. These things are amazing. I can weigh my baby food in exact portions. I can measure breastmilk and use a bottle without measurements on the side. (1 ml = 1 g) I know exactly how much my meat weighs when I vacuum seal it to freeze. I can double check the accuracy of weights from grocery delivery services. And I haven't even mentioned that I can bake with extreme accuracy! Can you tell how much I love this kitchen scale? And it was a gift!

We were able to store all of this in the existing space in our kitchen cabinets AND make everything more accessible. How did we do it?

We installed blind corner shelves in one of our blind corner cabinets.

I've looked these up for years. We looked into Shelf Genie. I googled different types. I looked up DIY videos and how-tos to get ideas for what people did with a tight budget. Nothing seemed to fit what I wanted to do so we put it off for a long time. Then back in 2020, when all this organization began, I decided it was time to purchase blind corner shelves and install them for my birthday present. 

This is the model we purchased. They're manufactured by Rev-a-Shelf.


Before buying them, I did a lot of homework, the main thing being measuring. We measured everything. I measured cabinet heights, cabinet lengths, cabinet depths, small appliance heights, pot heights, cutting boards, baking dishes. I measured a lot. Why? Because installing these shelves would involve rearranging pretty much every lower cabinet in our kitchen. 

And they're not cheap. 

There was one thing I couldn't measure and had to take a gamble on after purchasing and that was the space I would lose due to installation. Because this shelf rolls in and out on a track, it needs a few inches of height for installation. Nothing I read online in product descriptions stated this important piece of information. Our cabinets had double shelves so it was extra crucial this would work. 

So I gambled.

After they arrived, that was the first thing I did. I set up the track on the kitchen floor for a mock install, had my husband hold the shelf in place on the track because nothing was secured, and measured the height I would lose from the track installation: 4". 

4" is huge in the construction world. In this case, it meant my original storage plan of what I was intending to store on these shelves had to be scrapped and redone. Otherwise, we were going to be returning the most expensive birthday present of my life. 

So we went with plan B. And it actually worked out better than I thought it would have. We managed to rearrange all of our things, store the four extra kitchen purchases in our existing space, and make everything more efficient. 


We were so pleased with the way this turned out, and using these shelves is actually a lot of fun. The gliding is extremely smooth, and it really does live up to its name: "The Cloud." 

Now, you may be wondering how this can be more efficient since the shape of the cabinet is a perfect rectangle, and the shelf resembles nothing like a rectangle, which means you are losing out on square footage of storage. This was my conundrum for a long time which is why it took me so long to make the purchase. 

The answer is twofold. Yes, you are losing out on square footage because storing items directly into the cabinet and packing it in like tetris is the "best" way to use the most space. No, you are not losing out on efficiency because I can locate items located in the very back of the cabinet on this sliding shelf and take it out without displacing any other items in 10 seconds or less. This is impossible if I had crammed everything in like tetris: I would be left unpacking the entire cabinet to locate something in the very inside. Their design is the most efficient at maximizing the storage and maintaining maximum efficiency in an effortless way. 

My blind corner no longer disappoints me, but instead, brings me joy when I slide the shelf in and out.

When we have more time to complete DIY projects again, we can attempt the other one. I have an idea in my head, but it's not perfected. Anyone want to help bring my idea to life?  😀

Next time: The Pantry

Sunday, January 24, 2021

Storage 101: The Catalyst

Spending an increased number of hours at home this last year made me realize how dissatisfied I was with a lot of our storage and organization solutions. We've made do for the last 5.5 years in our house, but this past year was a big breaking point for us because so much of our time was spent inside at home, so it unkindly revealed parts of our storage that were not working. 

Now to understand me, you have to realize, I grew up "wrong" in a way when it came to storage and organization. My mentality up until about....last year was paying for bins, drawers, containers to store your stuff was "wasted" money. It was always seen as more useful to spend the money on actual items of use instead of something to organize the items. Sure, we bought shelves and drawers to organize, but that was where it ended: shelves and drawers. What we needed to learn was how to organize the actual shelf or drawer.

Which leads me to two of the big names in storage and organization: Marie Kondo and The Home Edit.

In 2019, we watched Marie Kondo's series on Netflix Tidying Up with Marie Kondo. It was entertaining to watch and resulted in us refolding all of our T-shirts to stand up. That didn't last and my t-shirts reverted back to the old way I'd been folding them for the last 15 years. In 2020, we watched The Home Edit. I was again inspired to reorganize after watching their techniques. My home reorganization has been a blend of both techniques and mentalities. 


Fun fact: Marie teaches her kids how to be tidy and keep things neat. I aspire to do that, too.

What I took from Marie Kondo:

- Sparking joy: There's a lot to be said about this mentality. I'm not going to get into the spiritual details she includes in her cleaning mantra as I don't agree with them entirely. However, I do agree that there is a sense of joy that comes from a well-organized space. Clean lines and organized containers which are visually appealing bring a sense of satisfaction and enjoyment when the contents are used. 

What I did not take from Marie Kondo:

- A lot of her folding methods to organizing clothes/sheets/towels involve folding on a flat surface. This is hardly possible for me because I don't have a flat surface to fold my clothes. Half the time, I'm folding laundry while my kids are playing. This means I have whatever sofa space is not covered by toys and books. I don't fold clothes on the floor because 110% of the time my floor is not clean enough for me to want to fold clean laundry on it. Therefore, I will pretty much never use her folding methods. Even as a short person, I fold everything standing up.  

I never understood how "house goals" could be a thing until I watched this series. 

What I took from The Home Edit:

- Using clear storage bins you can see through is extremely valuable despite the cost. The mantra "out of sight out of mind" is very true. We do not think about the things we cannot see and those are the items most often overlooked when it comes to storage. Think about your pantry or food storage. Chances are, the things you can't see are the items which expire and go bad. 

- Organization has to suit the daily needs. Frequented items need to be easily accessible. Just because you have 50 cubic feet of pantry space does not mean you can use the whole space because nothing located in the back will be easily accessible if you stack the front all the way up.

What I did not take from The Home Edit:

- Color coding items. They organized books and board games by color. This does not speak to me at all as a person. Does it look cool? Yes, yes it does. Is it functional for what I want when I organize books or board games? No, sorry.

- Labeling: I don’t label my bins. Being clear already, I can see what’s inside and know what the intended category was when I created it. Even if it’s not clear, I can tell what was intended to go into it to begin with. 

Why We Did It:

1. Being inside all the time meant little bits of disorganization and mess left us very unsatisfied and annoyed.

2. It was the cheaper option to maximizing space. We're not moving anytime soon. We're not undertaking any remodeling additions or layout changes.

3. We have the means to. I know not everyone does, and believe me, we've been there and done that when we reused old boxes and cardboard containers to create space dividers and organizers. I actually still do in small amounts. There's nothing wrong with creating DIY organizers. Does it look as nice? No, it doesn't. Does it save a lot of money? Yes. If that's where you are in your life stage, there's nothing wrong with organizing with what you have. 

The Spaces we Organized:

- Kitchen Cabinets

- Pantry

- Master Bathroom Drawers

- Master Closet

- Hall Bathroom Drawers


Follow along as I unpack the spaces we organized and how we did it. 

Part 1: Blind Corners